Artemia Hatchery Artemia Hatchery

Aquainfo.dk

Artemia Hatchery

Aquarium equipment doesn't have to cost a fortune.

Se galleri
You will need two bottles (preferably 2-liter), a utility knife, a drill, and a 5.5mm drill bit.

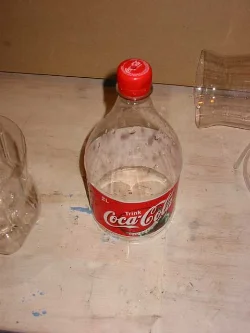
It is easy and inexpensive to build an efficient hatching station for Artemia salina nauplii using just two soda bottles. While many commercial solutions exist, none can beat this DIY model in terms of cost and simplicity.

Construction and Logic

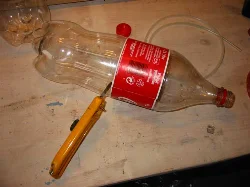
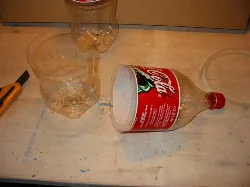
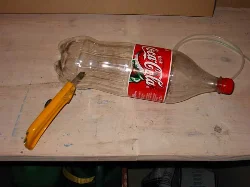
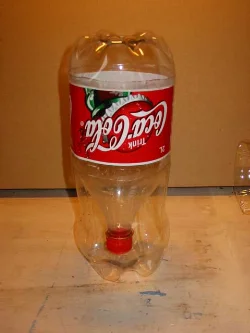
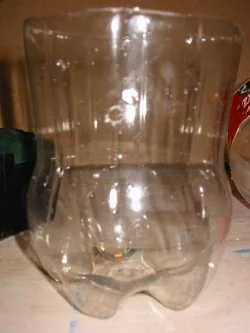
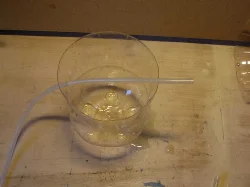
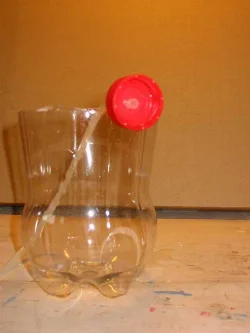
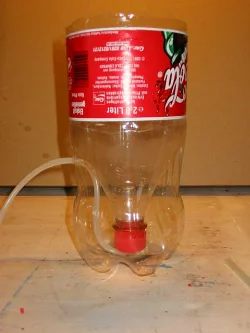
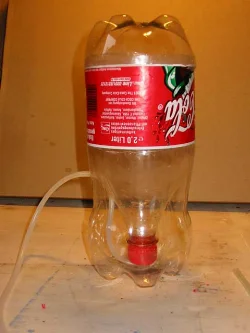
The design utilizes the inverted bottle principle, ensuring that the cysts remain in constant motion and do not settle in dead zones. By using the bottom of one bottle as a stand, you create a stable base, while the hatchery itself (the inverted bottle) allows for easy harvesting directly through the air hose at the bottom.

Optimizing the Hatch Rate

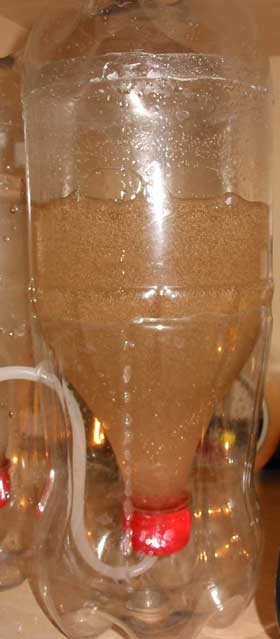
To maximize the yield of your brine shrimp, consider these factors: 1. Light: A light source placed above the apparatus stimulates hatching and helps concentrate the nauplii for easier harvesting. 2. Aeration: The airflow should be strong enough to keep all eggs in suspension without splashing them onto the dry upper walls of the bottle. 3. Water Parameters: Use lukewarm water with a salinity of 25-35 ppt (approx. 2 level tablespoons of non-iodized salt per liter).

Practical Maintenance

A minor drawback of this lightweight construction is the high center of gravity when full. You can increase stability by filling the base with silicone, sand, or plaster as a counterweight.

For a more permanent and robust daily setup, you might want to check out my advanced design: the "Deluxe Artemia Hatching Station".

Faktatabel

Quick Stats
Manufacturer

Hjemmelavet

Retailer

N/A

Price

10-20 kr.

Price 2

Lav

Power Consumption

Kræver luftpumpe

Flow Rate

Justerbar via luft

Length

30 cm

Materials

2 pcs 2-liter soda bottles, 1 meter of air hose, optional silicone.

Tools

Drill, 5.5mm drill bit, utility knife.

Billedgalleri

Hatching apparatus for live [*Artemia salina*](/en/artemia-salina) nauplii in operation.

Hatching apparatus for live [*Artemia salina*](/en/artemia-salina) nauplii in operation.

You will need two bottles (preferably 2-liter), a utility knife, a drill, and a 5.5mm drill bit.

You will need two bottles (preferably 2-liter), a utility knife, a drill, and a 5.5mm drill bit.

Using the utility knife, cut one bottle just below the label line.

Using the utility knife, cut one bottle just below the label line.

This gives you the two primary components: the hatcher and the stand.

This gives you the two primary components: the hatcher and the stand.

Cut the bottom off the second bottle to create a dust lid.

Cut the bottom off the second bottle to create a dust lid.

Visualizing how the three parts assemble into the finished unit.

Visualizing how the three parts assemble into the finished unit.

Drill a hole in the side of the stand for the air hose entry.

Drill a hole in the side of the stand for the air hose entry.

A precise hole must also be drilled in the bottle cap for the hose.

A precise hole must also be drilled in the bottle cap for the hose.

The air hose is first fed through the stand from the outside.

The air hose is first fed through the stand from the outside.

Then thread the hose through the cap and screw the cap onto the bottle.

Then thread the hose through the cap and screw the cap onto the bottle.

The internal hose routing through the bottom of the apparatus.

The internal hose routing through the bottom of the apparatus.

The fully assembled hatching station ready for use.

The fully assembled hatching station ready for use.

Comments

Diskussion
Vi gennemser alle kommentarer.
J
Jan
2013-01-10 19:39:06
Hvordan høster du dem?
Aquainfo
Man slukker for luften og venter til de falder til ro - så synker de mod bunden, hvor du kan suge dem op med en pipette. Se evt. også her.
M
Mig
2010-11-09 16:53:34
Kan man sætte en luftsten på slangen? Det tar meget at lyden?
Aquainfo
Det kan du godt, men de har det med at stoppe til, så de skal renses ret ofte.
A
alexander
2008-04-01 21:14:36
og hvordan er det lige der kommer luft ind gennem slangen?
Aquainfo
Man sætter den til en luftpumpe. Der skal være boret huller til gennemførslen af slangen og man skal sørge for at den ikke er i klemme, men det plejer ikke at være et problem.
M
Michael
2007-03-10 08:39:25
Man kan MEGET nemt få det tæt mellem luftslangen og proppen. Stik kun slangen 1/2 cm gennem proppen og pres så plastik-røret fra en knust luftsten ned i slangen fra modsatte side af hvor slangen går ind.
Aquainfo
Ok, tak for tippet - det må jeg prøve.
J
jimmy
2007-02-11 21:04:19
ok det vil jeg prøve, takker for svaret.
Aquainfo
Det var så lidt.
A
Anonym
2007-02-11 10:04:13
Hej Web. Jeg lavede en artemiaklækker som vist ovenfor, den har nu stået og "ruget" i 5 dage, men jeg syntes ikke at der er kommet mere end en meget lille brøkdel ud af det. faktisk kan de vist tælles på en hånd. hvad kan det skyldes.? Den står i et rum med ca. 20 grader.
Aquainfo
20 grader er i den lave ende, men de burde klækkes alligevel, bare lidt langsommere - dog ikke i nærheden af 5 døgn. Der er normalt ingen ben i det, men kvaliteten og alderen på æggene er vigtig og kan være problemet her. Selvom man ikke kommer salt nok i plejer det at lykkes alligevel. Når du starter en klækning, kan du godt regne med at hvis ikke de er klækket efter 48 timer, sker det næppe. Så efter 48 timer er der ikke andet at gøre end at smide det gamle ud og sætte en ny portion over. Prøv evt. at stille dem et sted hvor der er lidt varmere.
J
jimmy
2007-02-04 11:14:21
hvordan gør du luftslangen tæt så der ikke kommer vande ud af proppen? med silicone eller hva?
Aquainfo
Det kan være svært, hvis det ikke lykkes i første hug. Fidusen er at bore hullet mindre end slangen så slangen selv tætner hullet, men ikke for småt så slangen "folder" for så bliver det også utæt. Det er ikke lykkedes for mig at få tætnet det ordentligt med silikone - det bliver altid utæt efter kort tid, så i stedet laver jeg en ny prop hvis (når) problemet opstår.